Google Chrome™ and other Google™ products have built-in safety features to protect you while you browse. Combine this with the fact that the web is dynamic and everchanging, site-safety can change over time.
So when you see the dreaded Google blacklist warning: “This site may be hacked…”, the first thing to do is not to panic. Resolving this is simple and this article will methodically guide you to successfully resolve this issue.

“This site may harm your computer” notification
You’ll see the message “This site may harm your computer” beneath the site URL when we think the site you’re about to visit might allow programs to install malicious software on your computer.
One thing leads to another; so visiting such a website may actually do something to infect your computer or redirect you to a rogue website or trigger a malicious download etc. Carefully follow these steps to recover your site from malware.
Table of Contents
1. Symptoms of “This site may harm your computer” Incident
When you search for your website in Google, the results show a warning notification below each snippet.

When you click the URL in Google search results, you are taken to a Google-Interstitial page to protect you by attempting to prevent your visit and showing a verbose warning:
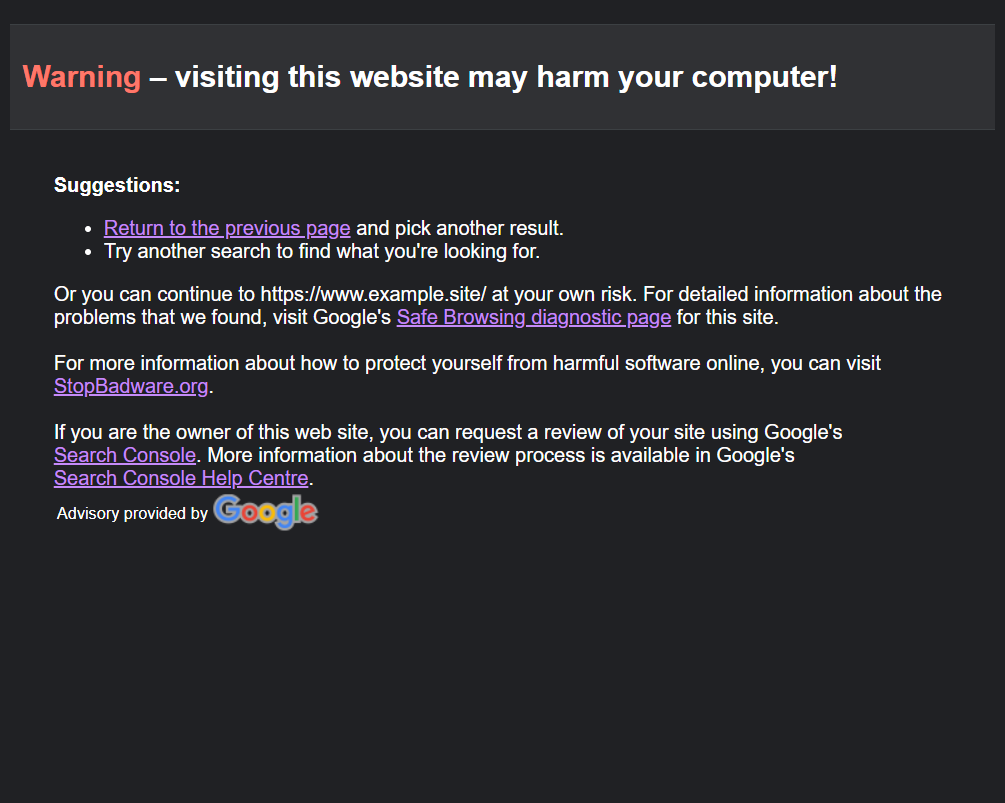
If you try to go to the website directly by pasting the URL in Google Chrome, here’s what it shows. The alert page also has a “Details” button allowing you to view further details and further explanation.

2. Impact of “This site may harm your computer” Incident
- Google will de-rank your website in the search results.
- Your competitors that used to rank lower than you will take up your search-ranking.
- Impact on search-ranks typically takes months to recover.
- Visitors will be wary of visiting your website; they will stop “trusting” your website.
- Your number of sales, number of subscribers will drop.
- Other search-engines, security vendors will pick signals from Google and will flag your website… sometimes even after your website is fixed (because there’s a delay fetching new information). This will have a snowball effect.
3. Fixing “This site may harm your computer” Malware Notification
A. Get hold of the reins by visiting the website-property in Google Search Console
Using the Google Search Console is an important step in identifying the details of why Google thinks your website is infected. Do not miss this step or you’d be going in circles trying to figure out where exactly and what exactly is the issue Google has found with the website.
If the website is not added to Google Search Console, it only takes a minute to set this up.
- Sign into Google Search Console.
- In the top left corner, click “+ Add Property“.
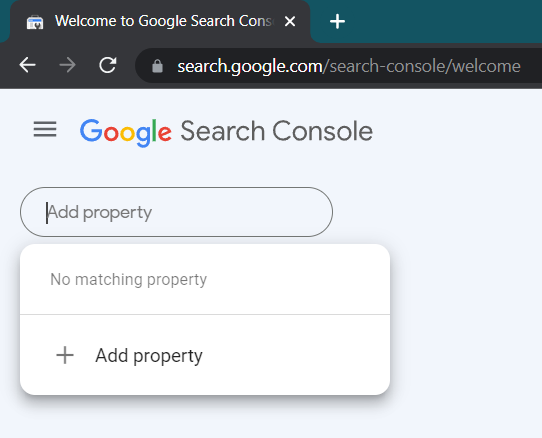
- Type in the URL of your website and click “Continue”.
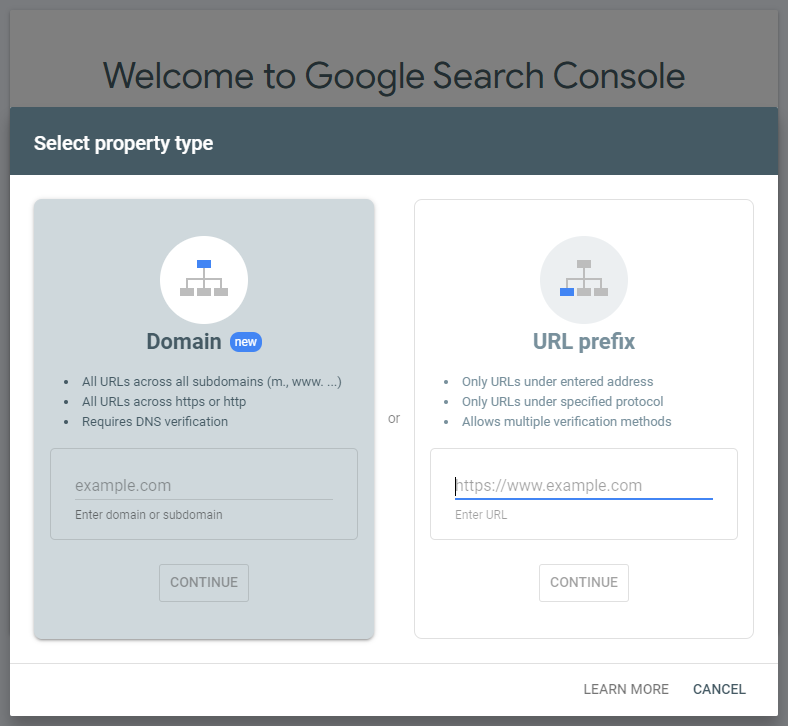
- Verify ownership. Easiest way is to download the file provided by Google but there are other verification options as well just in case.
Once website ownership is verified in Google Search Console, follow these steps to narrow down to the issue:
- Navigate / Ensure you are in your Google Search Console
- In the drop-down on the top left, find your website and click on it to select the respective property.
- In the left sidebar, scroll down to “Security & Manual Actions” and then “Security Issues“
The malware infection details will now be presented.

B. Scan Your Website for Malware
Depending on the type of your website, CMS and hosting etc. you’ll need to narrow down to a malware scanner that will work on your website. WordPress is a common CMS website platform and there are several plugins available to scan WordPress for malware. If you are not using a content management system and you have a static website, you can use ClamAV to detect and remove malware. For the sake of this article we’ll focus on our own Malcure WordPress Malware Scanner to keep it straight and simple.
- Install and activate the plugin Malcure Malware Scanner.

- Update to the latest definitions by connecting with the API server. The plugin provides a free connection to the latest definitions from the API server to help detect the latest breaking malware.
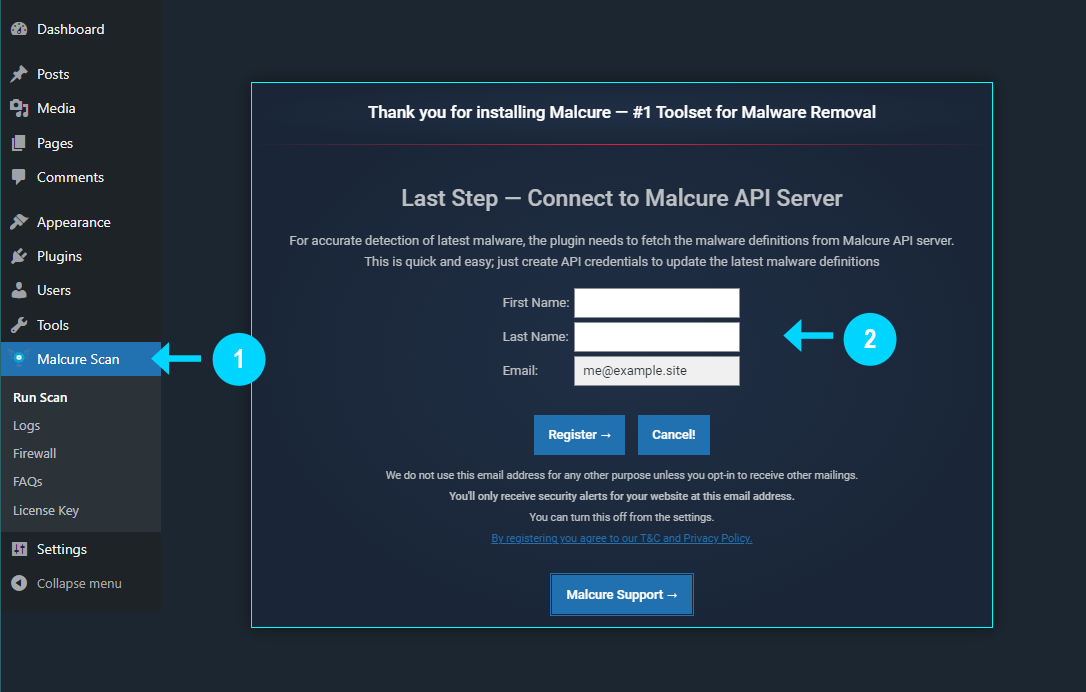
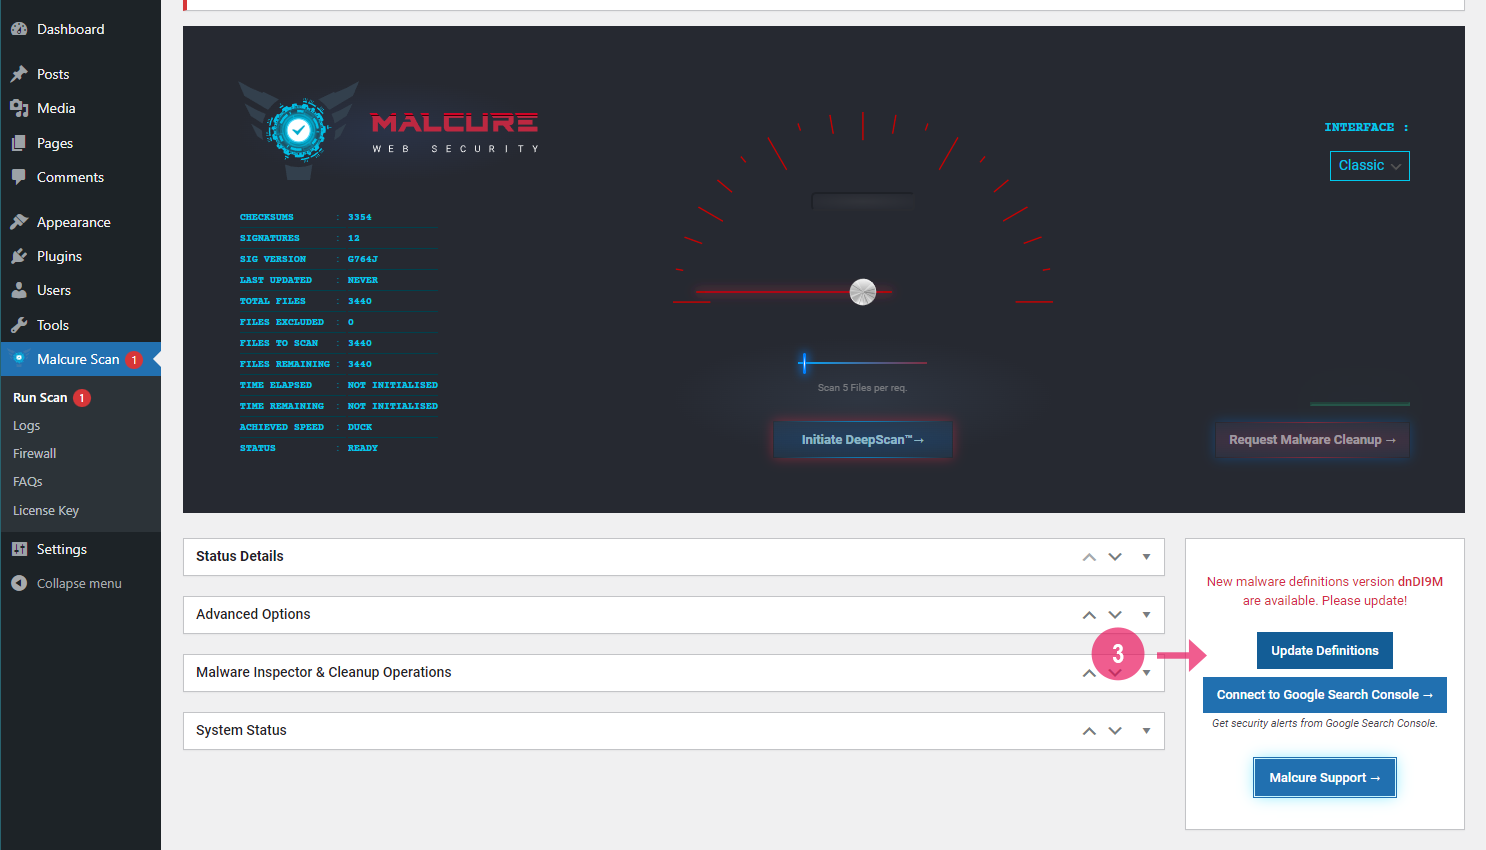
- Initiate the scan by going to the plugin page and clicking on “Initiate DeepScan™”.
- Wait for the scan to complete and for full results to be available.
C. Cleanup Steps for “This site may harm your computer”
Once you have the complete scan results available, it is time to take the next steps.
In the case of a WordPress website, the infection can potentially be at two places:
- The database.
- The files.
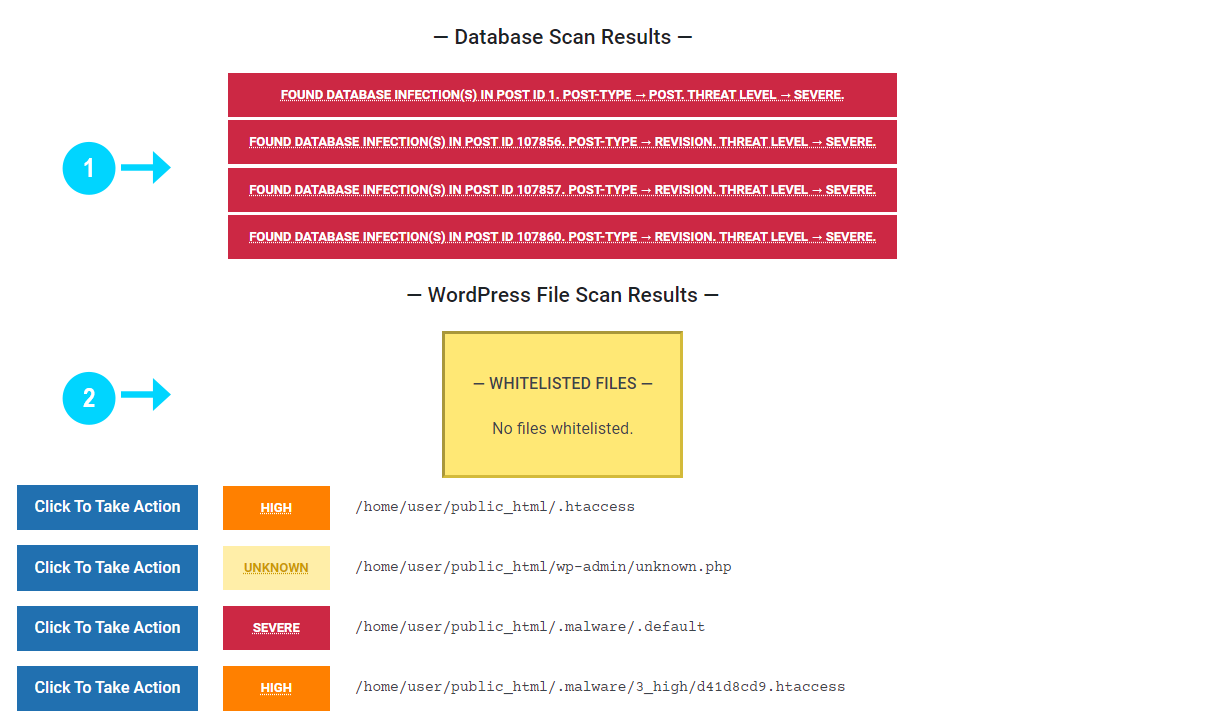
a. To Cleanup the database
Identify the database record as presented in the results and navigate to it using phpMyAdmin. Typically database infections contain rogue JavaScript injections or rogue links hidden inside HTML markup. Identify and remove the same. Follow this guide to clean malware from large WordPress database dump.
b. To Cleanup the files
Identify the infected files in the result and use an FTP program to inspect the respective files for code. Deleting the file straightaway may (will) break your website and make it unreachable.
To identify if a file needs a cleanup instead of deleting, you’ll need to figure out if the file is a part of WordPress core, one of the active themes or one of the active plugins or a dependency. In case of such a file, you’ll see that the file will contain some genuine code in addition to some malicious code. Here are tutorials to efficiently reinstall WordPress core and infected WordPress plugins via WP CLI:
Step-by-Step guide to efficiently reinstalling infected WordPress Core using WP CLI
Step-by-Step guide to efficiently reinstalling infected WordPress Plugins using WP CLI
If the file is not a part of WordPress or its dependencies, the file will only contain malicious code and can be safely deleted.
c. Re-Scan your website to verify proper cleanup
This is a critical step before attempting to clear the website from Google. Requesting a review of issue that weren’t fixed will result in longer review cycles. For instance, if your website is still infected when you file a review, there will be a lot of back-and-forth and Google will ask you hard evidence to identify the exact steps you took to eliminate the malware and will also longer to revert back. So let’s be thorough and get it cleared at once.
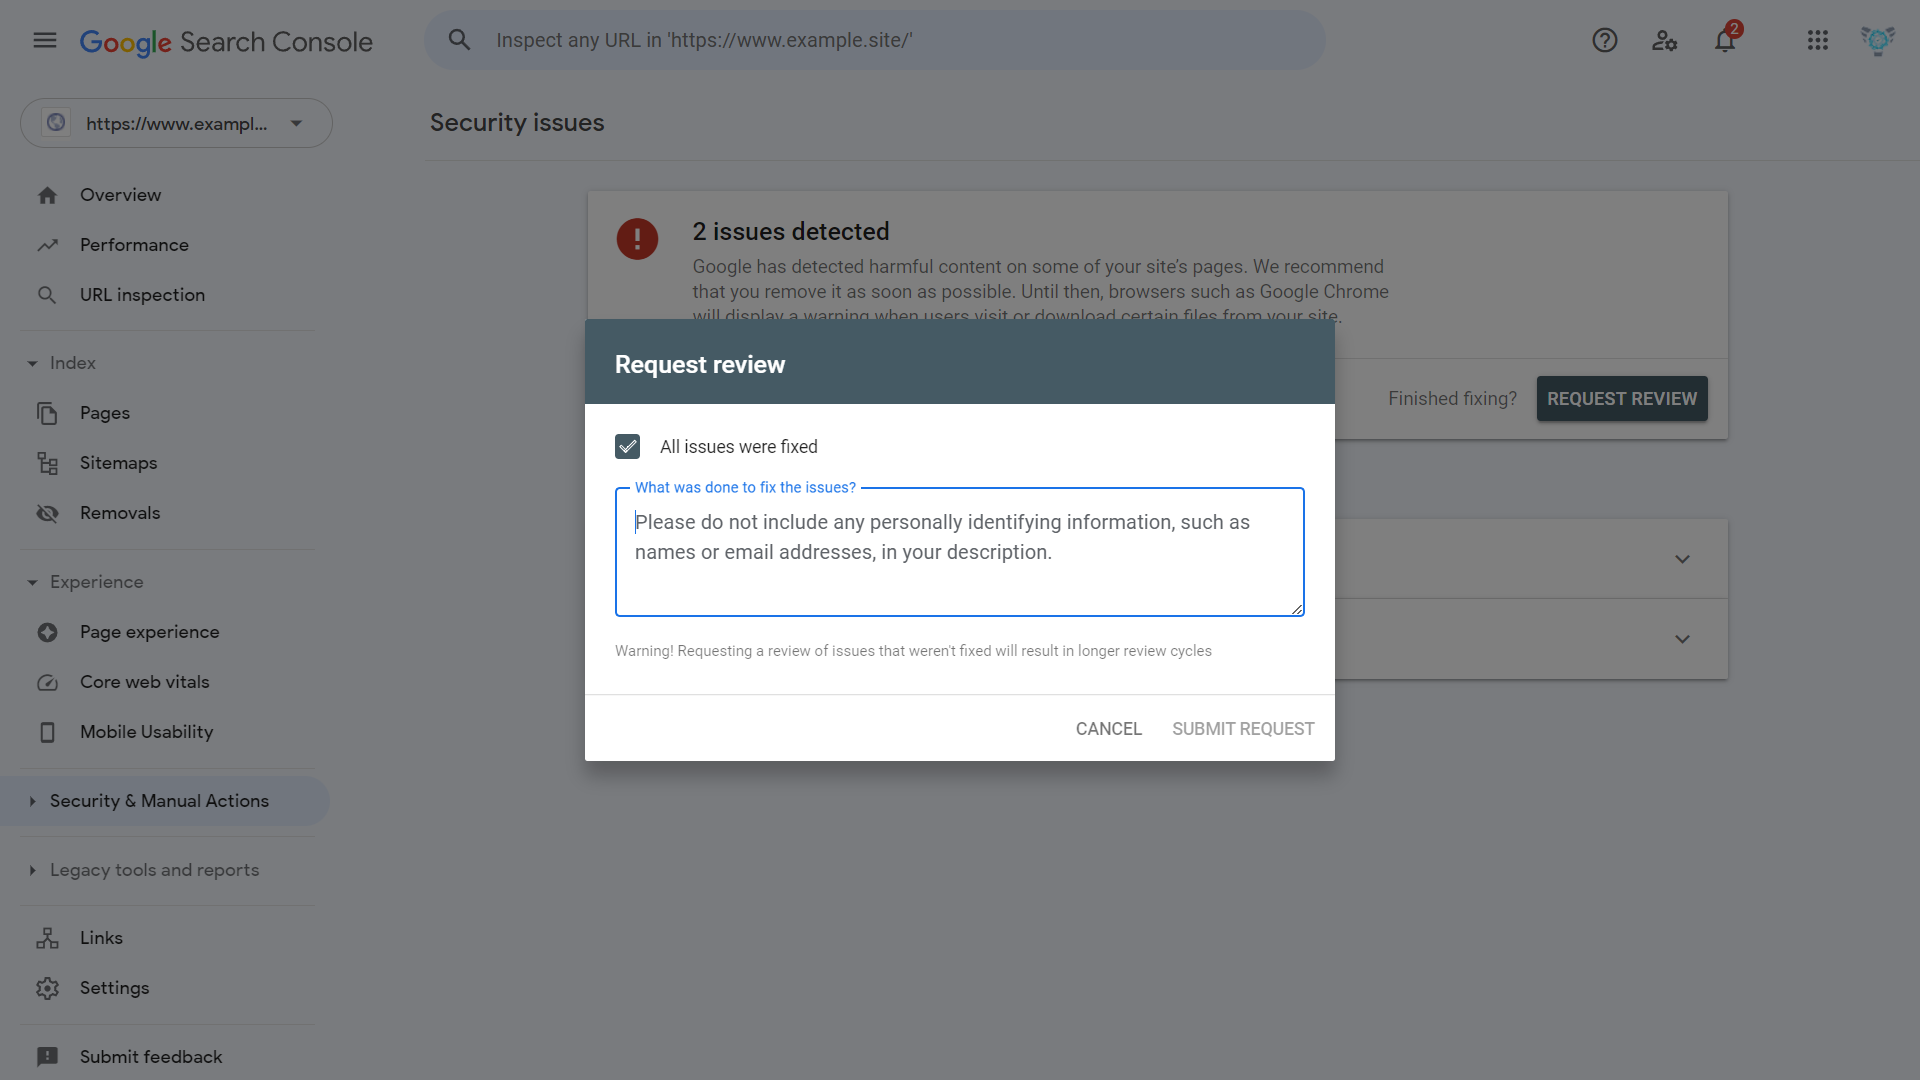
4. Request Google to Review & Clear The Website
Navigate back into Google Search Console > Security & Manual Actions > Security Issues
Find the “Request Review” button. Clicking on it will popup a modal dialog requesting information on what you did to fix the issue. Please provide a brief and click “Submit Request”.
In our experience the response time is typically the same business day. Keep your fingers crossed and watch out for any reinfection. Upon a successful review you’ll receive an email like this from the Google Search Console team. If not, do not hesitate to get a professional hand to sort this out for you. Malcure’s malware removal service covers McAfee / Google blacklist removal, restoration of Google Ad Campaigns and much more.

See Also:
- Understanding and Resolving the Vuln.php Recurring Malware Issue
- Download WP CLI Temporarily & Using With Custom PHP Versions
- Cyber Cells Intercept Hackers Attempting to Access COVID-19 Patient Data
- How to Fix a Blank WP-Admin Page in WordPress — A Comprehensive Guide
- Step-by-Step Guide to Cleaning Up Massive JavaScript Malware Redirects NDSW / NDSX / NDSJ